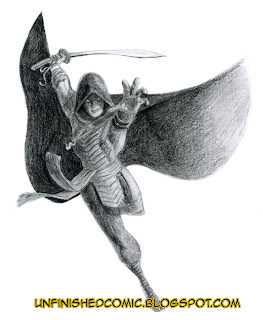
The techniques used here work best on a detailed pencil drawing with a lot of tonal variation. It's designed to keep the texture of the original pencil strokes in tact while creating an explosion of colour to add interest to the piece. By that I mean, if it starts rough and grainy, it'll end up rough and grainy, and if it starts finely textured your end result will be too, so make sure that you get your original drawing to the state you want it at before you scan and start. The image above is a drawing I did a few years ago. It's fairly detailed, with a strong grainy paper texture.
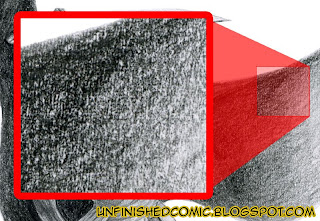
As you can see in the picture above, shading with graphite generally relies upon the interaction of the black graphite dust and the white paper beneath it to give the impression of shades of grey, and for this reason you'll probaby get disappointing results if you simply used the "Hue/Saturation" modifier. Your colors would appear very dull and quite dark, because it's still a lot of black dust on a white backround with only a slight bit of grey to actually add colour to. Thus the first thing we need to do is to turn the blacks and white into shades of grey.
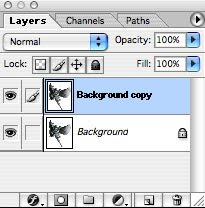
Start by duplicating your background layer. There are several ways to do this and I assume you already have a personal favourite, but I tend to just drag the layer onto the "Create New Layer" button at the bottom of the Layers panel. Rename the layer for reference purposes. Now we create some shades of grey. There are 2 basic ways of doing this: The Gaussian Blur filter (Filters>Blur>Gaussian Blur), or the Median filter (Filters>Noise>Median).
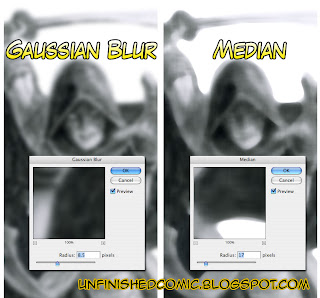
The image above shows a comparison of the effects of the 2 filters. Gaussian Blur basically gives each pixel a new colour based mathematically on the colours of the pixels within a defined radius, with nearer pixels contributing more than distant ones, resulting in a softer, unfocused image. Median, on the other hand, reduces the color variation (or noise) between pixels by giving each pixel the average colour of every other pixel within it's radius. This method results in crisper edges, while smoothing out the tone in the body of a colour block. A common use for this filter is for eliminating the moiré patterns one gets when scanning from a printed image.
You can use either... The Gaussian Blur is best if you don't want crisp edges, Median is best if you do. For the purposes of this image I went for the Gaussian blur. Now for some colour.
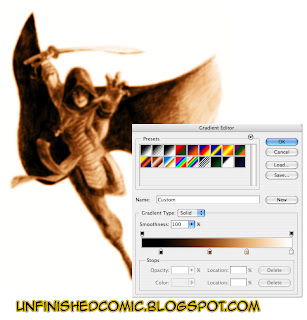 You can use the Hue/Saturation modifier to add color, but I find it a little limiting on the variation you can get in your midtones. The best bet is to use a Gradient map. Duplicate your blurred layer and rename it something appropriate, I went with "Skin" as that's what this colour pass will deal with. Apply a Gradient Map (Image>Adjustments>Gradient map). Click on the gradient bar to adjust your gradient, and add in your midtones. Play with the gradient until you are happy with the colour on your image and then apply it.
You now have a nice colourful image... but the texture of the original drawing is no where to be seen. It's time to put it back. Select your background layer, which should be unchanged from your original scan, select all and copy it. Go into quick mask mode, and paste. You should see a red wash over all the dark parts of your image. The wrong parts are masked though, so we need to invert it.
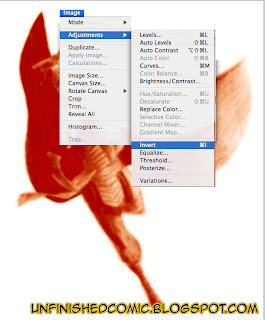
Upon exiting quick mask mode you should see "marching ants" around all the dark bits. Make sure you're you've got the correct layer selected (In this case "Skin".)
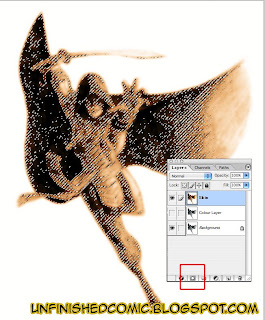
Now we add a layer mask. The button at the bottom of the Layers panel, marked with a red square in the above image. The layer mask will make any pixel not in the selection transparent. and if you turn off your background layer you should see something like this:
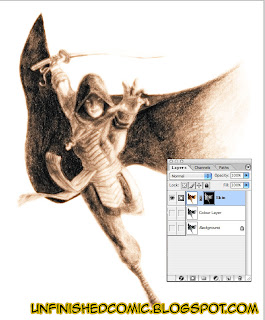 Of course, our serpent warrior isn't wearing skin coloured clothing, and likely your drawing is going to have a bit of a variety of color too. We need to mask out everything that isn't going to be this colour. Ensure that you're working on the layer mask and not the layer itself. You can tell by looking at your Layers panel. If your working on the layer mask, there will be a thick rectangle around the layer mask's thumbnail.
When in layer mask mode you only have the option of shades of grey, white representing 100% opacity, and black representing complete transparency. Use your favourite method to apply black to all the parts that don't need to show through.
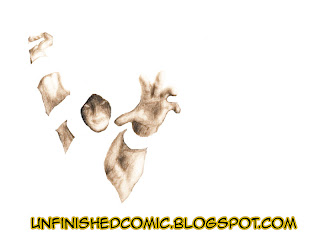 Now go and repeat that with every other colour. This may seem a little tedious, but it's going to keep the problems to a minimum. As you get a feel for the technique you'll run through it pretty quickly and intuitively know where to take short cuts.
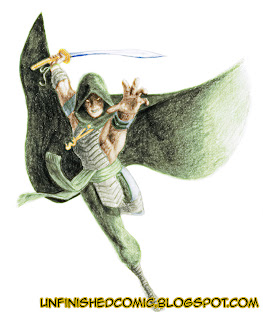
This technique is pretty good for colorizing anything. If there's no grain to preserve (as in a black and white photograph) you can do away with the blurring and layer masks and simply use the gradient map technique. I hope you've enjoyed this tutorial and found it helpful... Let us know what you thought!
Other articles you may be interested in:
One Point Perspective Tutorial
Some of my pencil drawings
Colorised Comic Book Art


No comments:
Post a Comment